Storefront File Upload for Products
Customers upload images, PDFs, or other files on the product detail page with preview and optional cloud storage.
To the Plugin in the Shopware Store
Set up Cloud Upload and obtain an API key
Storefront
If the upload option is enabled for a product, an upload area will be displayed on the product detail page.
Clicking on the upload area will open a file selection dialog. Alternatively, a file can be dragged and dropped onto the upload area to initiate the upload. You can choose whether customers are required, allowed, or prevented from uploading files before adding a product to their cart.

While the file is being uploaded, a progress bar is shown. After the successful completion of the upload, a preview image is generated and rendered in the upload area.

Adding the product to the shopping cart, clears the upload area so that another file can then be uploaded.
If a product with an upload is added to the shopping cart multiple times, it will always be listed as a separate item inside the cart.
Preview Image
When you hover over the preview image, a magnified version of the preview image appears. This function can be enabled or disabled in the settings.
Preview images are generated for the formats JPG, JPEG, PNG, TIFF, GIF, BMP. When using the Cloud Upload, preview images can also be generated for PDF and SVG files.

The preview image is displayed in the subsequent order process instead of the product image (can be disabled). Additionally, the filename and the size of the uploaded file are visible.


Administration
After you have installed the plugin, you can enable the upload feature for your products. How to configure the default settings for all products is described in the chapter Settings. The chapter Product Settings explains how to configure the upload settings at the product level.
In the Download Files section, you will learn how to download files attached to an order.
Settings
To open the plugin settings, go to Extensions > My Extensions. Click the "..." button (1) of the plugin and then select the Configure (2) option.

If your shop has multiple sales channels, you can configure the plugin for each channel individually. Just click on the Sales Channel (1) dropdown to select a specific sales channel.
After changing the settings that are explained in the following sections, do not forget to click the Save (2) button before leaving the settings page.

Upload Server Settings
When using the plugin, uploaded files can be stored on your own server (Local Upload) or in our Codebarista Cloud Upload Service (Cloud Upload) with a German hosting provider. You can decide whether to use Cloud Upload. Local upload is enabled by default.

In the Cloud Upload > Configuration section, you will learn how to configure Cloud Upload. You can switch between Local Upload and Cloud Upload at any time without losing uploaded files for already placed orders. However, the switch should be done in maintenance mode to prevent customers from receiving an error during checkout if their cart contains products with files that were uploaded using the old method. Both methods, along with their respective advantages, are described in detail in the Local Upload and Cloud Upload sections.
Default settings for all products
Default values can be defined for uploads. These values apply to all products of the selected sales channel. You can override the default values with product-specific ones.

With the Default Product Upload Requirement, you determine whether customers must upload a file before adding an item to the cart or if the upload is optional. You can also disable the file upload by default for all products. You can override the default setting in the Product Settings.
With the Default value for allowed file formats (2), you can specify which file formats can be uploaded. Please also refer to the notes under Product Settings. This default value can be overridden by a product-specific setting.
The Default maximum file size (3) specifies the maximum allowed size of uploaded files. Please also refer to the notes under Product Settings. This default value can be overridden by a product-specific setting.
The Default custom text (5) is displayed when the Display custom text in the storefront (4) switch is enabled. Both settings can be overridden by product-specific settings.
Appearance
When the mouse pointer hovers over the upload area in the storefront, a magnification of the preview image of the uploaded file can be displayed. You can enable this feature using the Preview Magnifier (1) switch.
By default, the preview image of an uploaded file replaces the product image in the cart and the checkout process if it could be generated. This can be disabled with the Replace product image with preview of uploaded file (2) switch. If you disable this switch, the preview image is still visible in the upload area, but not in the cart or during the checkout process.

You can also modify the text snippets (3) displayed in the storefront. If your shop is available in languages other than German and English, you can add them here. Further helpful information on text snippets can be found in the official Shopware documentation.
Clear the cache after you change these settings.
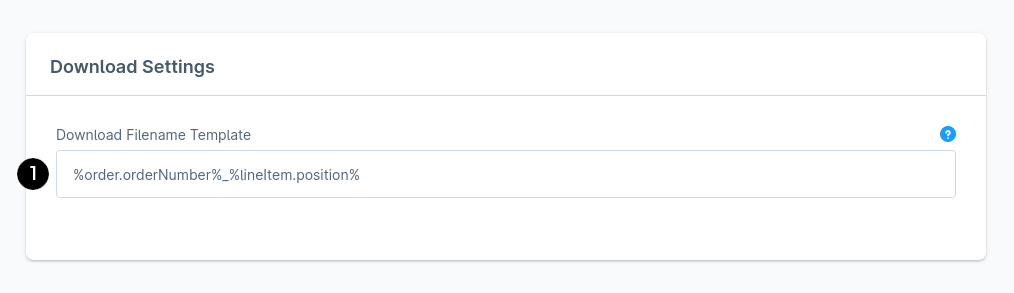
Download Settings
With the Download Filename Template (1), you can determine how the file name is formed when downloading uploads.
For example, if you want every file to start with the prefix my_shop_, you can use the following template:
my_shop_%order.orderNumber%_%lineItem.position%
my_shop_10034_2.jpg
If you clear the template field, the original name will be used for the downloaded file when using the cloud upload. When using the local upload, a random name assigned by Shopware will be used in this case.
Please note that not all file names are accepted by your web browser and your operating system. Therefore, it may be that the file name of the downloaded file does not correspond exactly to your template. For example, avoid using a dot (.) as a separator and use a minus (-) or an underscore (_) instead.
The following variables are available to you in the template:
| Variable | Example | Description |
|---|---|---|
| %order.orderNumber% | 10091 | A unique number assigned by Shopware for each order. |
| %order.amountTotal% | 19.99 | The gross amount of the order. |
| %order.amountNet% | 16.8 | The net amount of the order. |
| %order.positionPrice% | 19.99 | The gross amount of the order position. |
| %order.shippingTotal% | 0 | The shipping costs of the order. |
| %order.id% | 018fdef6c91a7395854cfb2f095a8 | The database ID of the order. |
| %lineItem.productId% | 018c4b0276c17267ab589276d9d | The database ID of the product. |
| %lineItem.quantity% | 1 | The quantity of the product in the order position. |
| %lineItem.label% | Variant Product | The name of the product. |
| %lineItem.position% | 1 | The number of the order position. |
| %lineItem.unitPrice% | 19.99 | The unit price. |
| %lineItem.type% | product | The product type. |
| %lineItem.id% | 018fdef6c91a7395854cfb2f07e8c | The database ID of the order position. |
| %product.productNumber% | SWDEMO10005.1 | The product number. |
| %product.codebarista-upload-filename% | IMG-20220310-WA0013.jpeg | The original name of the uploaded file. |
| %customer.customerId% | 018fdef6b66970f8b1f64b1289680709 | The database ID of the customer. |
| %customer.email% | customer@example.com | The customer's email address. |
| %customer.firstName% | Elliot | The customer's first name. |
| %customer.lastName% | Example | The customer's last name. |
| %customer.customerNumber% | 10030 | The customer number assigned by Shopware. |
Storage Settings
With the Delete uploads on order completion or cancellation (1) switch, you can determine when an uploaded file that is assigned to an order is deleted. If the switch is activated, an upload will be deleted when the order status is set to "Completed" or "Cancelled" in the administration. Deactivate the switch to keep uploaded files even after an order has been completed or cancelled.
If you are using the Cloud Upload, uploaded files will be deleted regardless of this setting after the maximum retention period.

Product Settings
In the Product Settings, you can specify whether a product requires file upload. Open the product's settings page through Catalogs > Products. Select the product and then open the Specifications (1) tab.
If you run a multilingual shop, check the selected Language (2) on the settings page and switch to the language of your choice, if necessary.

Scroll down to the Additional Fields section at the bottom of the page and select the File Upload (1) tab.
With the Requires File Upload (2) select-field, you specify whether the upload area will be displayed on the product detail page in the storefront and whether customers must upload a file before adding an item to the cart or if the upload is optional. When no option is selected, the default from the Plugin Settings will be used.
You can determine which types of files are allowed for upload through the Allowed File Formats (3) text field. Enter the allowed file extensions (no leading period), separated by commas, for example, jpg, jpeg, png, pdf, tiff.
When using the plugin with Local Upload, file type restrictions from Shopware also apply. You can find further information on this in the section Local Upload > Supported File Types.
You can define a Maximum File Size (MB) (4) for uploads by entering the desired number in this field. Enter the integer value in megabytes (1MB = 1024KB). If the field is empty or if you enter 0 (zero), the file size is not limited.
If you are using the plugin with Local Upload, additional restrictions from PHP apply to the maximum file size. For more information, refer to the chapter on
Local Upload > PHP Settings.
If you are using the Cloud Upload, the maximum file size is limited to 500 megabytes. If you enter a larger value, it will be displayed, but the upload is still capped at 500MB.
Use the Custom text (6) Field to enter a message that is shown below the upload area when the Display custom text in storefront (5) toggle is enabled. The message will be shown below the hints for the allowed file formats and maximum file size. You may use basic HTML-Tags like <strong> or <em> in the custom text.

Clear the cache after you change these settings.
Download Files
If a product that requires file upload has been ordered, you can download the uploaded file on the order detail page. Open the order detail page under Orders > Overview.
In the Positions (1) table, you will find the Upload (2) column. For order-items with uploads, the Download (3) link is located in this column.

Once the status of an order changes to Completed or Canceled, the uploaded file will be deleted. Deleted files cannot be restored, even if the order-status is changed back. However, you can request a new upload.
Request Re-upload
If an uploaded file does not meet your requirements, you can request a re-upload.
Click on the "..." button (1) of the order-item and then select the Upload... option.

Click on Request New Upload to generate a re-upload link.

Copy the re-upload link and provide it to your customer.

The re-upload link points to an upload page within your shop.


Once a new file is uploaded, the new upload replaces the old one. You can now download the new file through the Download link on the detail page. The old file is no longer available.
You can cancel the re-upload request as long as a new file has not already been uploaded: Open the dialog again and click the Cancel Upload Request button. You can then download the old file as before through the Download link.
Uninstall
If you select the option Remove All App Data Permanently during plugin uninstallation, all local uploads will also be deleted. Cloud uploads remain unaffected. You can request the deletion of all cloud uploads at any time. Cloud uploads will be automatically deleted no later than the maximum retention period of 30 days.
Local Upload
When using Local Upload, files are uploaded to your server and stored there.
Advantages
All data stays on your server. There is no retention period, and the number of files that can be uploaded is limited only by the disk space available on your server.
PHP Settings
The default PHP settings allow file uploads with a maximum size of 2 megabytes. To increase this limit, you need to adjust the values of upload_max_filesize, post_max_size, and memory_limit in the PHP settings. To upload files with a size of up to 512 megabytes, the following settings are required:
upload_max_filesize = 512M
post_max_size       = 560M
memory_limit        = 1G
Detailed information about these three settings and how they are related can be found in the PHP documentation. The value of memory_limit should not fall below the system requirements of Shopware.
Please note that PHP settings cannot be changed through the Shopware Administration. Contact your hosting provider if you are unsure about how to modify PHP settings on your server.
Supported File Types
When using Local Upload, only file types supported by Shopware 6 Media Manager can be uploaded. You can find the list of file types supported by your Shopware version in the Shopware documentation.
You can modify the list of file types supported by the Media Manager by adjusting Shopware's filesystem configuration (keyword: allowed_extensions).
With the product setting Allowed File Formats, you can further restrict the file types that can be uploaded for a product. However, you cannot extend the set of allowed file types beyond the file types supported by the Shopware Media Manager.
Free Up Storage Space
Uploaded files associated with an order are deleted upon order completion or cancellation. Files for which no order was triggered can be deleted using the Shopware CLI:
bin/console media:delete-unused --folder-entity=codebarista_uploads --grace-period-days=1
The command deletes all uploaded files that are at least one day old.
To preview the list of files that will be deleted, include the --dry-run parameter.
The command should be executed regularly (e.g., through a cron job).
The --grace-period-days option and the ability for plugins to prevent the deletion of individual files by the
media:delete-unused command, was introduced with Shopware 6.5.1.0.
It's therefore not possible to use the method described above in earlier versions of Shopware.
If you are using an older version, obsolete uploads have to be deleted manually.
E.g. through the Media-Explorer in the administration.
Cloud Upload
When using Cloud Upload, files are uploaded to our Codebarista Cloud Upload Service and stored with a German hosting provider.
While you are renting the plugin, you have a quota of 5 gigabytes for a maximum of 10,000 files, with a retention period of up to 30 days. The usage of the Codebarista Cloud Upload Service is free within this quota. Please note that the maximum size of a single file is 500 megabytes.
Do you need more cloud storage or have other requirements? Then contact us!
Advantages
Uploaded files do not consume storage space on your server, and no traffic is consumed from your hosting package when uploading, nor is your server's bandwidth impacted.
Preview images are generated by the Codebarista Cloud Upload Service and do not put a strain on your server's CPU. The Codebarista Cloud Upload Service additionally supports generating preview images for PDFs and SVGs.
There are no limitations on supported file types, and you do not need administrative knowledge to enable file uploads with sizes greater than 2 megabytes or to regularly delete unused files.
If your shop experiences significant growth, the Codebarista Cloud Upload Service can scale with you. You do not have to worry about details like storage space, bandwidth, and CPU performance.
Obtain API Key
To use Cloud Upload, you need an API key.
You can obtain your API key here.
Configuration
In the Upload Server Settings: Activate the switch Use Cloud Upload (1). Enter your API key (3) along with the URL (2) of the Codebarista Cloud Upload Service https://upload.codebarista.de. Ensure that the connection is made via https.
You can test whether the configuration is correct, by clicking Test Connection (4).

You can configure the plugin differently for each of your sales channels. This allows you to use Cloud Upload for one channel while using Local Upload for another.
When switching to Cloud Upload, local uploads can still be accessed. However, the switch should be made while in maintenance mode. Otherwise, customers may encounter errors during checkout if their cart contains products with files uploaded using Local Upload.
Clear the cache after you change these settings.
How It Works
When you use Cloud Upload, files are no longer uploaded and stored on your server. Instead, they are sent directly to the Codebarista Cloud Upload Service, which stores the uploaded files with a German hosting provider.
Your personal API key is used to authenticate your shop with the Codebarista Cloud Upload Service.
Uploaded files for which no order has been placed will be deleted after one hour. When an order is placed, the uploaded files are frozen. After freezing, the files are available for a maximum of 30 days. Within this period, they can be downloaded through the administration as many times as needed. If the order is completed or canceled in the administration, the files are immediately deleted.
FAQ
When are the uploaded files deleted?
In general, uploaded files are deleted when the status of the corresponding order changes to "completed" or "canceled".
If you are using Local Upload, files for which no order is placed, must be deleted with the Shopware Command Line. Section Free Up Storage Space describes how to accomplish this.
If you are using Cloud Upload, files for which no order is placed within one hour are deleted automatically. Files that are associated with an order will be retained for 30 days. Refer to the How It Works section for more details.
Why are preview images for PDFs and SVGs only possible with Cloud Upload?
When you use Local Upload, Shopware functions are used to generate preview images. Currently, Shopware supports preview image generation for image formats such as JPG, JPEG, PNG, TIFF, GIF, BMP, but not for PDF and SVG files.
When you use Cloud Upload, previews can also be generated for PDF and SVG files because preview image generation is done in the Codebarista Cloud Upload Service.
However, since PDF and SVG files can be arbitrarily complex, preview image generation may not always be possible even with Cloud Upload. Your customers can still place their orders in such cases.
What happens when my Cloud Upload quota is exhausted?
We will notify you before your Codebarista Cloud Upload Service quota is exhausted. You can then delete uploads that are no longer needed to free up more storage space.
To maintain the availability of the Codebarista Cloud Upload Service for all users, we reserve the right to delete uploads or block new uploads in the event of a significant quota overrun.
If you need more storage space permanently, contact us so that we can find a customized solution for you.
Where can I find my API key for Cloud Upload?
You will receive your API key from us. Please contact us with your shop domain information to obtain it.
What service-level agreements does Cloud Upload guarantee?
We do our best to prevent outages or overloads of the Codebarista Cloud Upload Service. We do not offer guarantees regarding availability, response time, or speed. Feel free to contact us if you have specific requirements in this regard.
Is there a file size limit for Cloud Upload?
If you use Cloud Upload, the maximum file size is 500 megabytes. From our experience, uploads are usually only a few megabytes in size.
If you are using Local Upload, the maximum file size depends on your server settings.
Is there a bandwidth limit for Cloud Upload?
The bandwidth for uploading and downloading files is typically limited to 10 megabytes per second. However, depending on system load and other factors such as personal internet speed, the bandwidth may vary.
Version History
Shopware 6.5 (End of Life)
- Version 5.10.1 (2024-10-11): Resolved issue with special characters in text snippets
- Version 5.10.0 (2024-09-13): Upload still possible after long period of inactivity without page refresh
- Version 5.9.0 (2024-07-14): Choose whether uploads should be deleted on order completion or cancellation. Improved error messages
- Version 5.8.0 (2024-06-25): It is possible to choose between required and optional uploads
- Version 5.7.0 (2024-06-06): Configurable filename template for download filename
- Version 5.6.0 (2024-04-16): Upload can be disabled per product even if enabled by default
- Version 5.5.0 (2024-04-15): Default values can be configured, uploads can be enabled for all products. Display upload time in administration
- Version 5.4.1 (2024-04-05): Improved compatibility with other Plugins
- Version 5.4.0 (2024-02-19): Configure a custom text below the upload area per product
- Version 5.3.0 (2024-01-27): Configure file size limit per product
- Version 5.2.0 (2023-12-19): Preview image in cart can be disabled
- Version 5.1.0 (2023-12-17): Add support for Shopping Experiences
- Version 5.0.0 (2023-12-02): First version released in the Shopware Store for Shopware 6.5
Shopware 6.4 (End of Life)
- Version 4.4.0 (2025-01-28): Improved compatibility with other Plugins
- Version 4.3.0 (2024-01-27): Configure file size limit per product
- Version 4.2.0 (2023-12-19): Preview image in cart can be disabled
- Version 4.1.0 (2023-12-17): Add support for Shopping Experiences
- Version 4.0.0 (2023-12-02): First version released in the Shopware Store for Shopware 6.4